
Learning how to remove a shower drain takes about an hour once you know which of the four drain bodies is sitting in your pan. Pick the wrong method and you crack the base or snap the crossbars, which turns a cheap part into a full pan replacement. Here is the sequence that works, drain type by drain type.
The Short Version
- Look inside the opening first. Crossbars mean the drain unscrews from the top. No crossbars means it probably does not.
- Clear any clog before you pull anything. A packed hair mat snags the drain body on the way out.
- Cut the old putty or silicone bead with a utility knife before you apply torque.
- Turn counterclockwise, in small increments, watching the pipe below.
- If the pipe rotates with the flange, stop. That is a joint failure waiting to happen under the pan.
Step 1: Identify Your Shower Drain Type
Pull the grate, shine a flashlight into the opening, and look for crossbars, meaning two metal bars forming an X or a plus sign inside the ring.
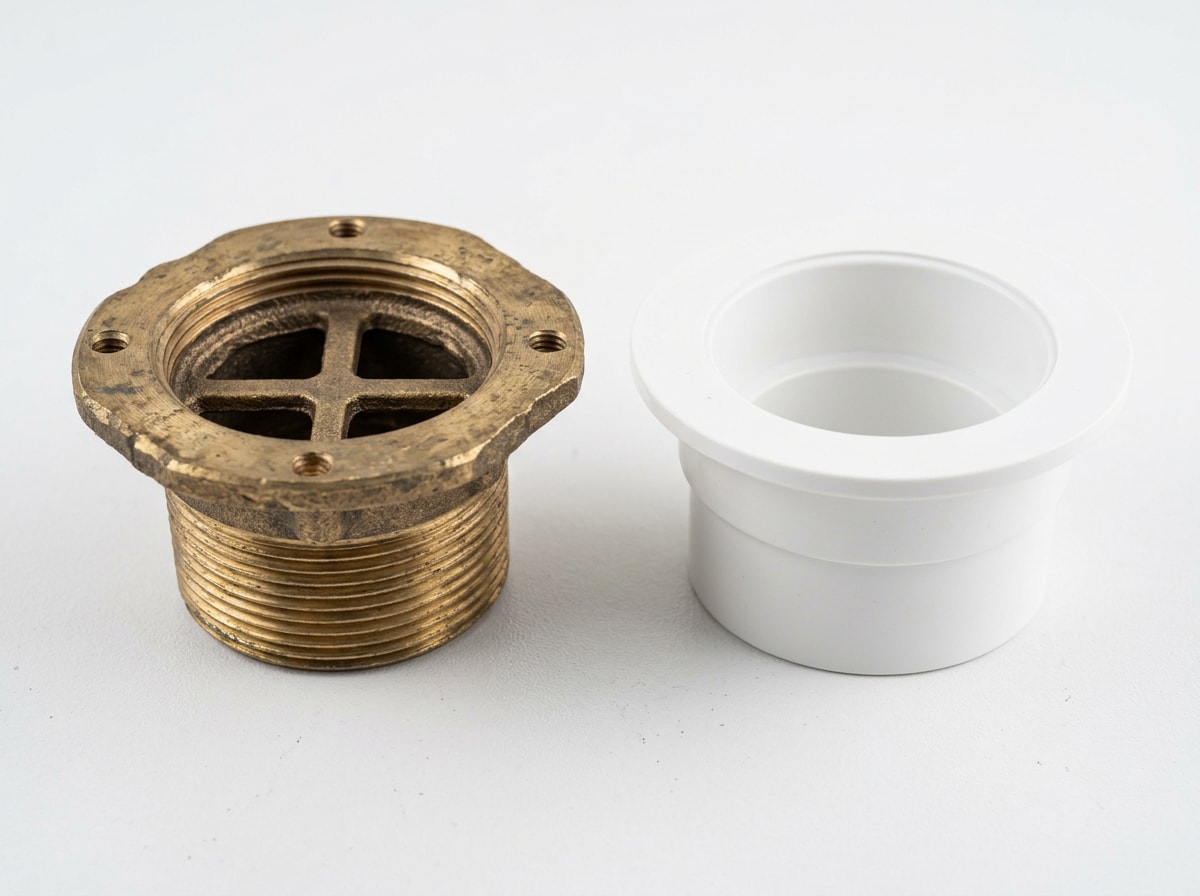
Crossbars mean a threaded drain flange that twists out from the top. A smooth collar with no bars means a compression or solvent-weld drain, and a solvent-weld body bonded to PVC or ABS will never unscrew. Forcing one cracks the pan.
Manufacturers build the same series in all three connection styles, which is exactly why two drains that look identical from above behave nothing alike. Oatey's cast iron and plastic shower drain series, for example, is offered in threaded, no-caulk, and solvent-weld variations.
| Drain type | How to spot it | Removal method | Tool needed | Comes out from the top? |
|---|---|---|---|---|
| Threaded flange | Crossbars inside the ring | Unscrew counterclockwise | Drain key | Yes |
| Compression / no-caulk | Smooth collar, rubber gasket below | Loosen the lock nut under the pan | Channel-locks, basin wrench | Usually no |
| Glue-in (solvent weld) | Smooth collar, no gasket, fused to pipe | Cut the body out or use an extractor | Mini hacksaw, drain extractor | No |
| Tile-in | Square or round insert set into tile | Lift the insert, then assess below | Two flathead screwdrivers | Sometimes |
One spec worth knowing before you shop for a replacement: most drains made for preformed shower bases are built around 2 in. Schedule 40 DWV pipe and accept a 4-1/4 in. snap-in strainer. Measure your old strainer across the face before you buy, because a 4-1/4 in. cover will not sit flat in a housing built for anything else.
Step 2: Gather Tools and Protect the Pan
Plan on one to two hours. Group your gear by what it does and the job moves faster.
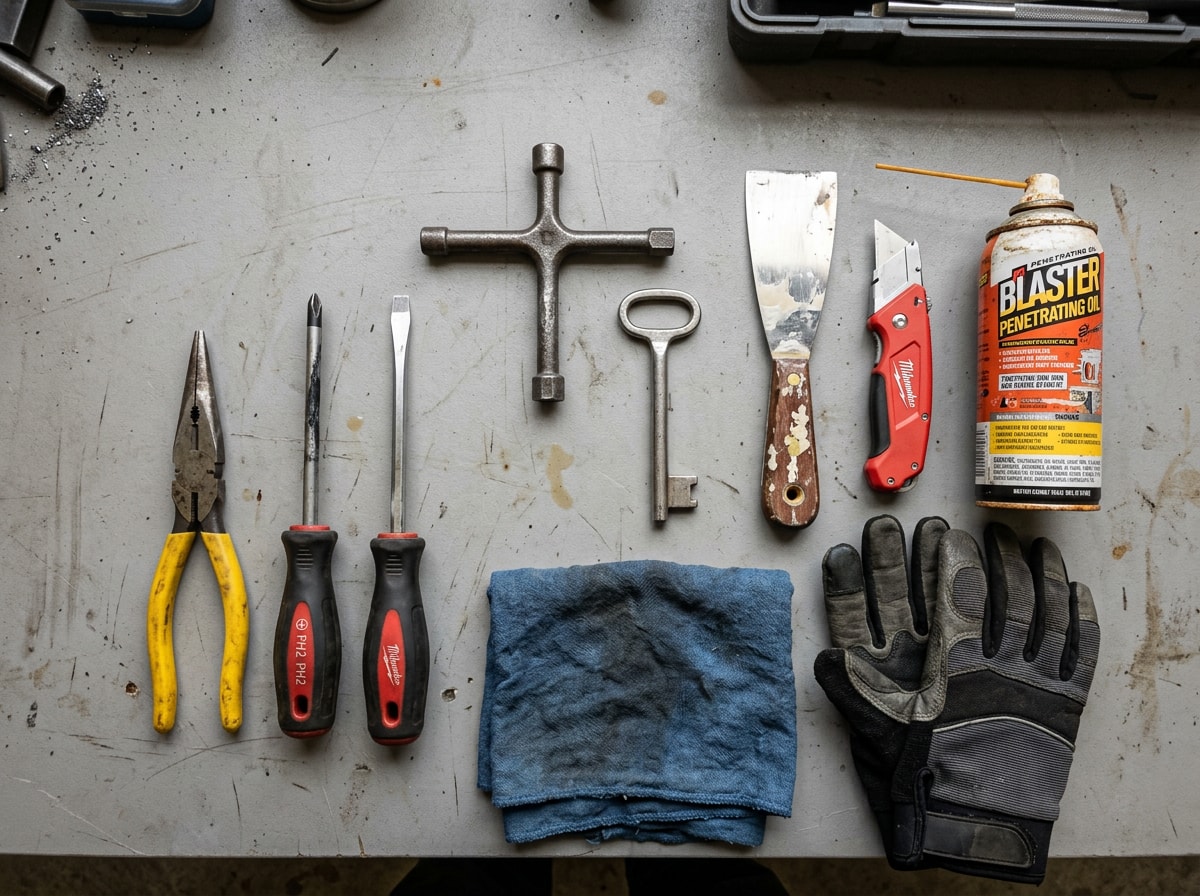
- Cover removal: Phillips and flathead screwdrivers, a lift hook, needle-nose pliers
- Flange removal: a drain key (sold as a drain wrench), channel-lock pliers, a putty knife, a utility knife
- Loosening: penetrating oil or a silicone lubricant
- Cleanup and sealing: rags, a flashlight, gloves, plumber's putty or silicone
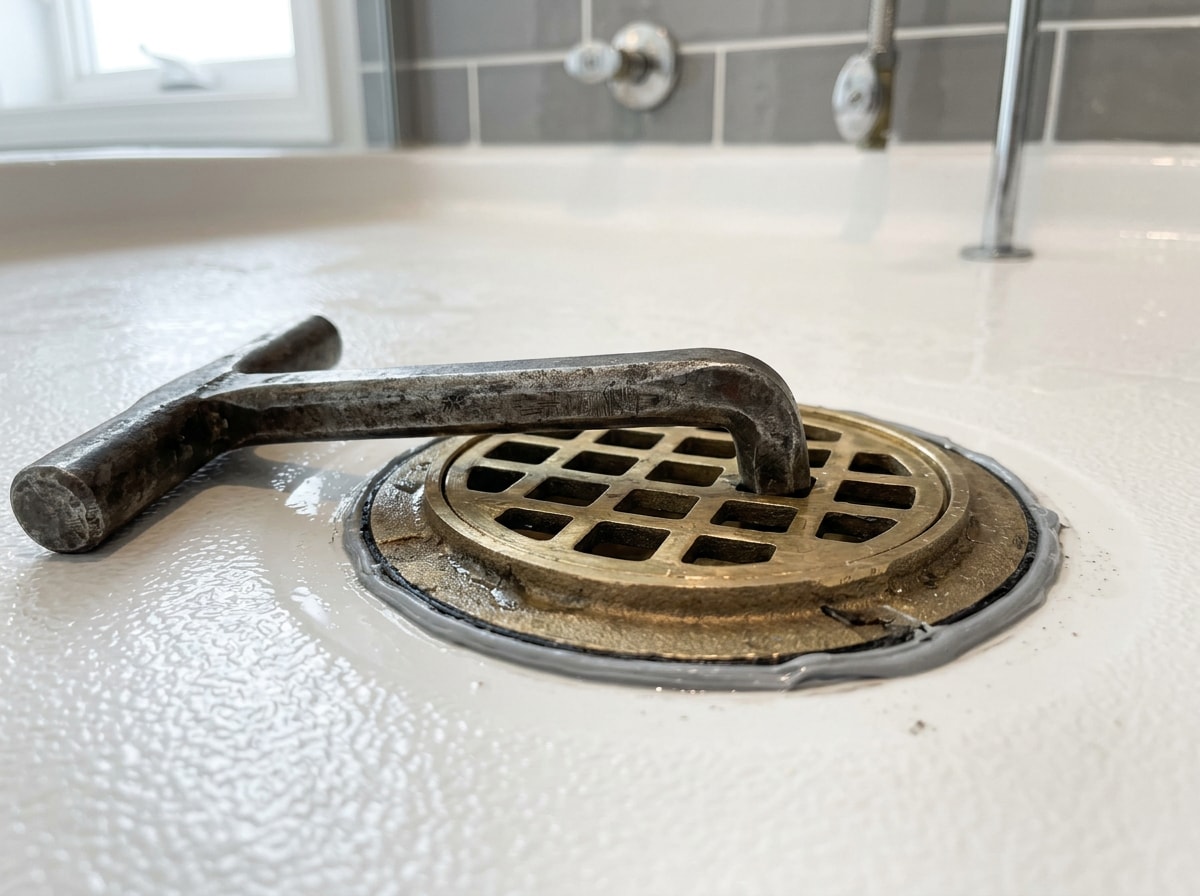
The drain key is the one shower drain removal tool most homeowners do not own, and it is the difference between a clean twist-out and a stripped flange. Skip cooking oil as a lubricant substitute. It washes into the line and feeds the next clog.
Now lay a towel across the pan so a dropped screwdriver hits fabric instead of acrylic. Then stuff a rag into the drain throat.
That second step matters more than it sounds. A dropped screw that clears the trap weir is not a quick retrieval. It is a pipe-opening job.
Step 3: Clear the Clog, Then Lubricate
Run the shower for two minutes and watch how fast the water goes down. A slow drain means you clear the hair clog before you touch a screw, because a packed mat of debris can gouge the pan or bend the fixture as the drain body lifts.
Pull what you can reach by hand or with a hooked zip tool, then follow with a snake if the blockage sits deeper. Our drain cleaning services page covers the full method for a stubborn clog, and the same approach applies to a tub, which we walk through in our guide on how to unclog a tub.
Next, coat every visible part of the assembly with penetrating oil or silicone lubricant, then pour a little into the opening to reach the threads you cannot see. Give it 10 to 20 minutes before applying force.
For a genuinely stuck drain, escalate gently:
- White vinegar dissolves hard-water calcification around the rim.
- Light tapping with a screwdriver handle breaks a corrosion bond.
- A hair dryer expands the metal and softens hardened sealant.
Step 4: Remove the Drain Cover
Dry the area first so your driver does not skid. Clear gunk out of the screw heads so the bit seats flush, match the driver type and size exactly, turn counterclockwise, and drop the screws straight into a container.
If a screw spins freely without backing out, the threads are stripped or rusted. Apply firm upward pressure while turning instead of cranking harder.
Screwless, Snap-In and Tile-In Covers
- Snap-in grates: seat a lift hook in one of the slots and pull straight up with finger pressure, then finish by hand.
- No hook handy: grip two opposing grate holes with needle-nose pliers, then twist and pull slowly.
- Lift-out covers: pry at the notch with a flathead or plastic putty knife, alternating opposite sides.
- Tile-in inserts: work two flathead screwdrivers under opposite edges and lift the insert off the drain body.
On plastic covers and brushed finishes, a plastic tool beats metal every time. Force cracks the housing, and a cracked housing turns a 20 minute job into a replacement.
Step 5: Remove the Threaded Drain Flange
The grate is only the lid. The flange is the threaded ring sealing the drain body to the pan, and it has to come out before a replacement goes in.
First, run a utility knife around the full circumference of the flange to cut the old caulk or putty bead. Fighting sealant and threads at the same time is how crossbars snap.
On a 1990s fiberglass base we pulled in a Watchung ranch, the flange backed out in under five minutes once the putty bead was scored. The crew's rule since then is simple: cut first, turn second, never the reverse.
Seat the drain key flat so the load spreads across both bars. Turn counterclockwise in small increments with steady pressure, and watch the pipe below.
If the pipe rotates with the flange, stop immediately. You are about to break the joint under the pan, and that becomes a demolition job.
Pliers work as a fallback, with tips on opposite sides of the crossbars, but they concentrate force on a small area. Snapped crossbars mean switching to an internal drain extractor. A cracked pan means a new base.
Step 6: Clean the Seat Before Anything Goes Back In
Lift the loosened flange free, sliding a putty knife under the edge to release remaining sealant. Scrape the old putty or silicone off the pan seat until it is bare.
Wipe down the exposed drain pipe and rinse the trap to flush leftover sludge. The seat should be clean, dry and free of debris, because anything left behind becomes a leak path.
While the assembly is open, check the trap. The International Residential Code trap requirements call for each fixture trap to hold a water seal of not less than 2 inches and not more than 4 inches, and fixtures are not allowed to be double trapped. If someone added a second trap during a past remodel, fix that now rather than after the new drain is sealed.
Planning a full tear-out instead of a swap? That is a different scope, and our bathroom remodeling team handles pan, drain and tile together so the waterproofing stays continuous.
When to Call a Plumber
Some conditions are a hard stop:
- Water appearing anywhere other than the drain opening, which points to supply lines or the drain piping itself
- A solvent-welded drain with no access from below
- Tile or stone showers rather than a molded base
- Snapped crossbars with the flange still seated
- Any repair that requires opening the ceiling below
This is cost avoidance, not caution for its own sake. The EPA's guide to mold, moisture and your home advises drying wet materials within 24 to 48 hours to prevent mold growth, and a rotted subfloor costs far more than a drain assembly.
If the drain is already weeping into the framing, start with leak repair before the cosmetic work. Aumenta Plumbing works throughout northern and central New Jersey, including Westfield and Watchung, and licensed techs handle the drain types that do not come out from the top.
Not sure which drain you have? Send a photo of the opening and get a free estimate before you put a wrench on it.
FAQ
How do you remove an existing shower drain?
Identify the drain type, take off the cover, cut the old sealant bead around the flange with a utility knife, then unscrew the flange counterclockwise with a drain key. Compression and glue-in drains do not unscrew and need work from below the pan.
Which way do you turn a shower drain to remove it?
Counterclockwise, viewed from above. Turn in small increments and stop if the pipe below starts rotating with the flange.
What tool do you use to remove a shower drain?
A drain key, also called a drain wrench, which seats on the crossbars and spreads the load across both bars. Needle-nose or channel-lock pliers work as a fallback but concentrate force and are more likely to snap the crossbars.
How do you remove a shower drain cover with no screws?
Hook a lift tool into one of the grate slots and pull straight up, or pry at the edge notch with a flathead or plastic putty knife, alternating opposite sides. Tile-in inserts come up with two flathead screwdrivers under opposite edges.
How do you remove a stuck shower drain cover?
Escalate in order: penetrating oil with a 15 minute wait, white vinegar for mineral buildup, hair dryer heat, then gentle tapping around the perimeter. Never force it, since excess pressure strips screw heads and cracks plastic housings.
Are shower drains glued in?
Many are. Solvent-weld drains are chemically bonded to PVC or ABS pipe and cannot be unscrewed. They are removed by cutting the drain body out or using an internal extractor, usually with access from below.
Can a shower drain be replaced without tearing up the floor?
Usually yes on plastic and fiberglass bases with a top-mount threaded drain. Tile, stone, and glued assemblies generally need access from underneath or a specialty replacement drain designed for top installation.
How much does it cost to replace a shower drain?
The part itself is one of the cheaper plumbing components. Labor is the variable, and it depends almost entirely on access, drain type, and whether the pan or subfloor is damaged, so get a written quote once the drain type is confirmed.