Most homeowners searching how to fix a leaking shower head are dealing with one of three problems, and only one of them is actually the shower head. Match the symptom to the right repair and you are usually finished in under an hour with a wrench and a part that costs a few dollars. Start by figuring out which leak you have.
Match the Leak to the Fix
Watch the fixture before you touch a tool. Note exactly where the water shows up and when.
| What you see | Most likely cause | The fix | Difficulty |
|---|---|---|---|
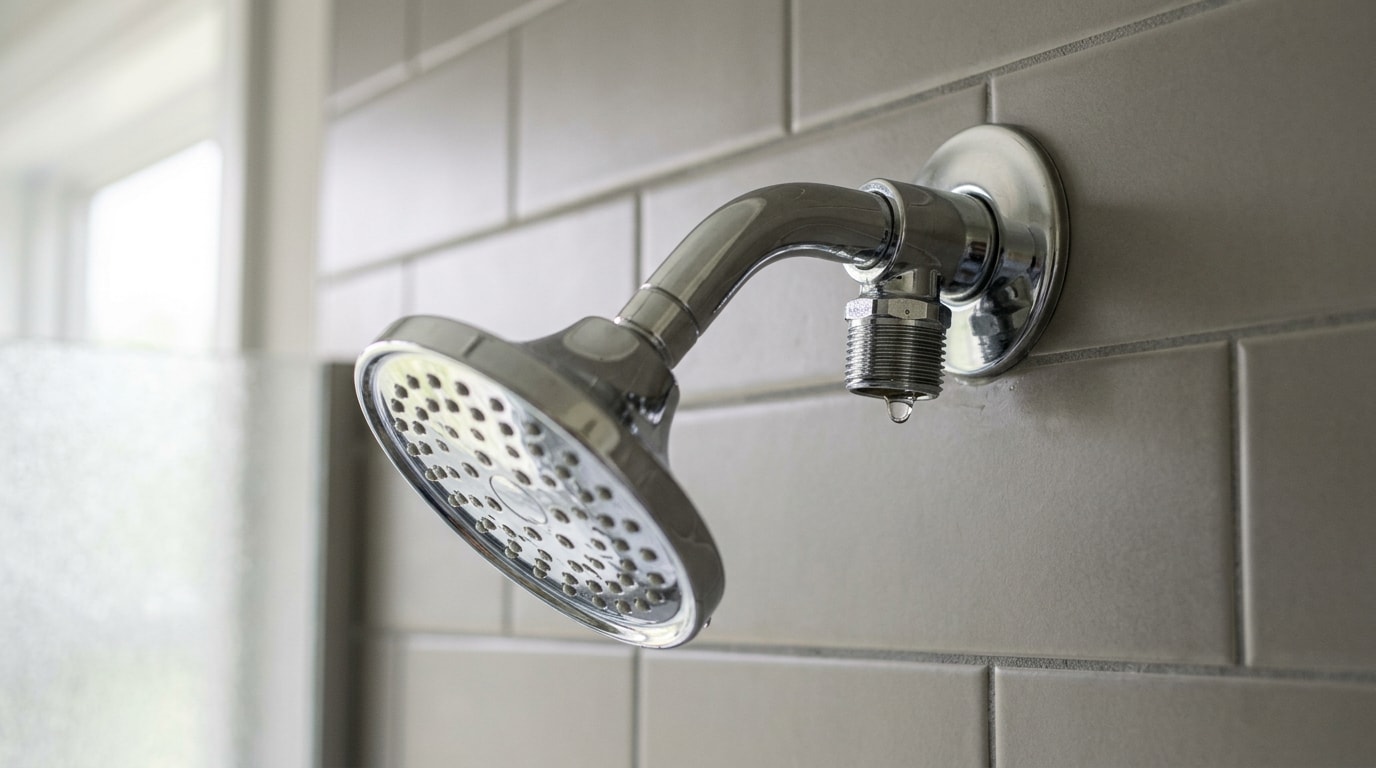
| Water at the threads while the shower runs | Loose connection, crushed gasket, or clogged debris screen | Clean, reseal, retape, reattach | Easy |
| Spray going sideways or dribbling from the face | Mineral scale in the nozzles or mode selector | Vinegar soak and scrub | Easy |
| Drips for hours after the handle is off | Worn valve cartridge inside the wall | Replace the cartridge | Moderate |
| Water at the wall, ceiling, or floor below | Failed shower arm joint or in-wall pipe | Call a plumber | Pro only |
| Leak returns after a new gasket and a new cartridge | Scored valve body or cracked head housing | Replace the valve body or fixture | Pro only |
One quick test: run the shower, dry the threaded joint with a towel, and watch. If beads reappear at the threads within seconds, the seal at that connection failed, not the head.
Tools and Parts You Need
Gather everything before the water goes off:
- Adjustable wrench or slip-joint pliers
- A cloth or rag to protect the finish
- Plumbers tape (PTFE thread seal tape)
- A replacement gasket, washer, or O-ring
- White vinegar and a zip-top bag
- An old toothbrush
- A screwdriver and hex key for valve work
Take the old gasket to the store with you and match diameter, thickness, and profile. They are not universal, and a near miss will weep under pressure.
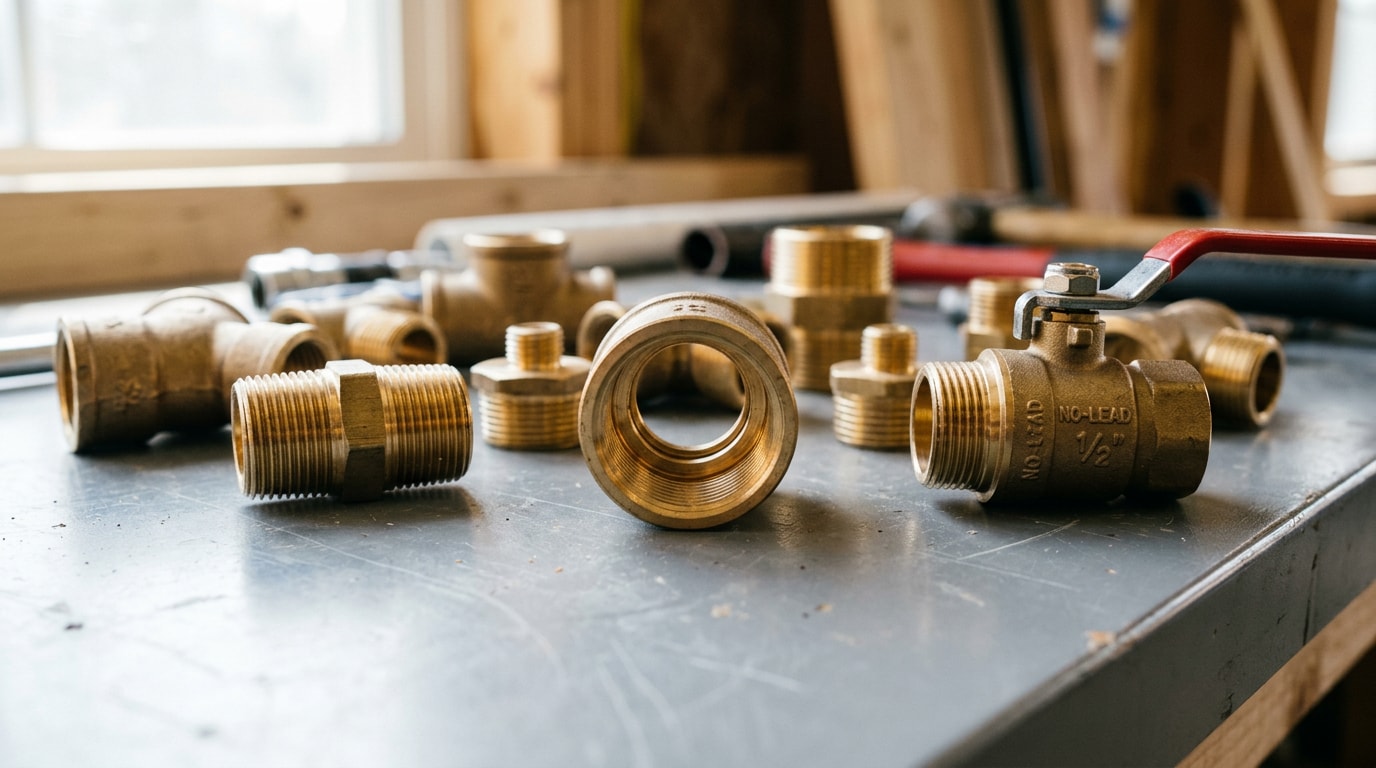
Shower arms and heads in the United States use 1/2 inch threads, so the female fitting on the head has to match the male threads on the arm. If thread callouts confuse you, our guide to female pipe threads in plumbing explains the labeling in plain language.
How to Fix a Leaking Shower Head Step by Step
Work in order and test after each step. Most leaks stop before you reach the end.
1. Shut Off the Water Supply
Showers rarely have a dedicated shutoff.
If your bathroom has an access panel behind the shower wall, often in a closet or hallway, check for stop valves there first.
Otherwise close the main water valve for the house, then open a downstairs faucet to bleed off pressure.
You can skip this step if you are only unscrewing and cleaning the head, since the handle is already closed. Shut the main off before any cartridge work, no exceptions.
Lay a towel over the drain. Escutcheon screws and retaining clips are small, and any drain cover beats fishing one out of the trap.
2. Remove and Clean the Head
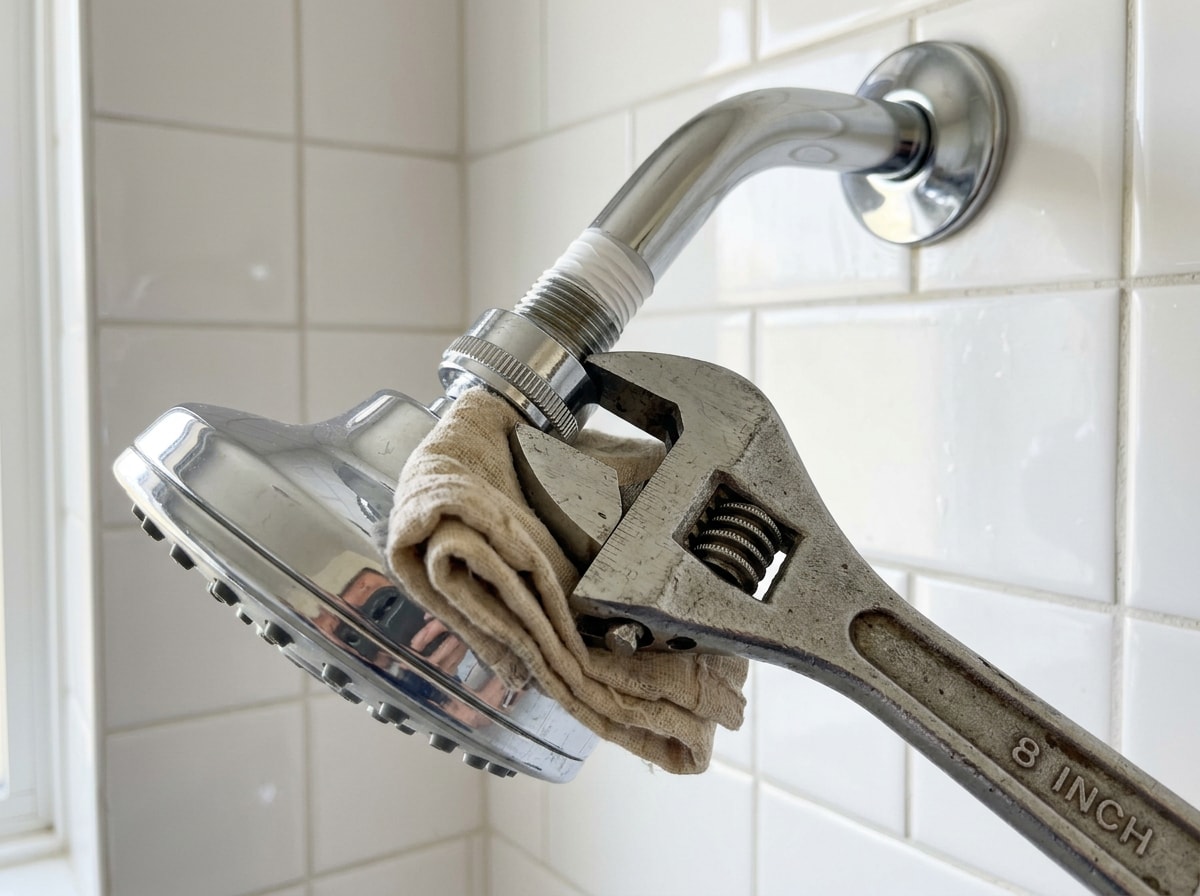
Turn the head counterclockwise. Wrap a cloth around the connection nut before the wrench touches it so the plating survives. If the shower arm starts to rotate inside the wall, steady the arm with a second pair of pliers.
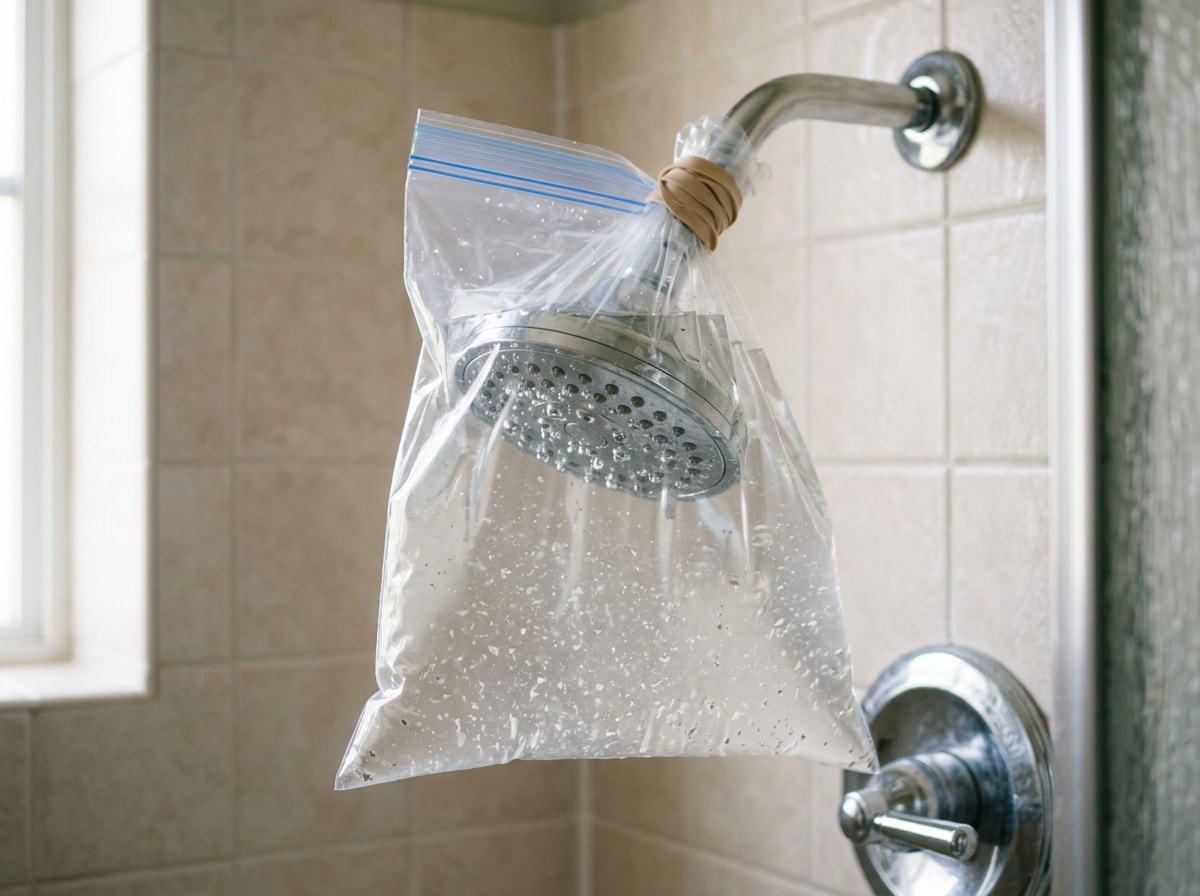
Now descale. Fill a bag with white vinegar, submerge the face, and tie it off.
Chrome and plastic tolerate an overnight soak. Limit brass, gold, and brushed nickel to about 30 minutes, since acid dulls plated coatings.
Scrub the nozzles with a toothbrush, rub the rubber jets with your thumb, and pull the debris screen from the inlet to rinse it clear.
Skip abrasive pads, bleach, and toilet bowl cleaner. All three permanently mar a plated finish.
3. Replace the Gasket, Washer, or O-Ring
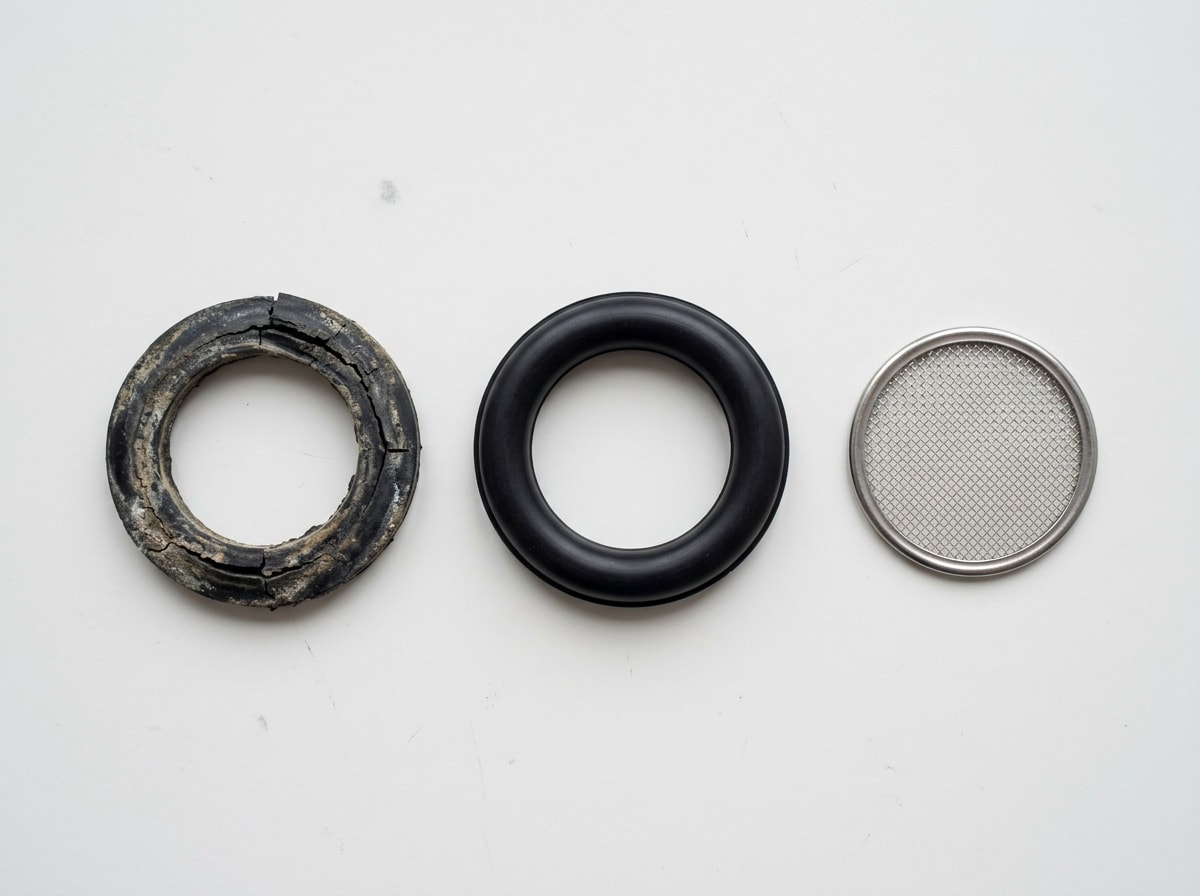
Look inside the connection nut. The rubber seal seated there is a consumable part, and heat, chlorine, and overtightening all age it.
Pull it out with a fingernail or a small pick and hold it next to the new one. If the old seal is flattened, hardened, cracked, or shiny where it should be matte, it is done.
Seat the replacement squarely in its groove, flat side against the shoulder, with no twist or pinch.
A rubber washer seals by compression on its own. Do not stack thread tape on top of it or bed it in silicone. That is the single most common reason a fresh gasket still will not hold.
4. Tape the Threads and Reattach
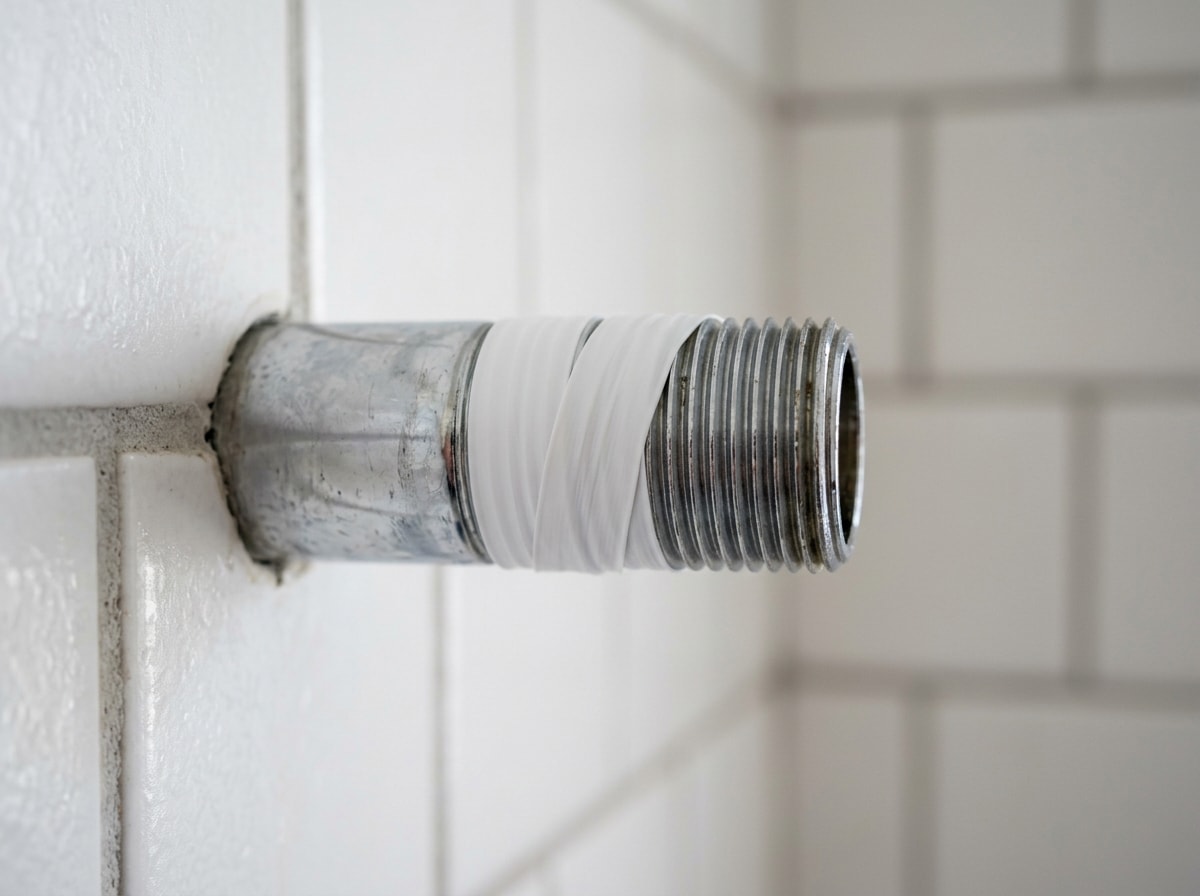
Wrap thread seal tape clockwise around the shower arm threads, the same direction the head screws on, so tightening does not unravel it. Two to three wraps is plenty.
PTFE tape is a lubricant and gap filler, not a bandage for a failed seal.
Extra wraps cause failures rather than preventing them. The added bulk increases the effective thread diameter, and a plastic nut can split as it bottoms out.
Hand tighten first, add roughly a quarter turn with a cloth-wrapped wrench, then stop.
5. Pressure Test It
Turn the water back on and run the shower for a full five minutes. Dry the joint and check it again. Then check it once more the next morning, because slow weeps rarely show up in the first minute.
What Causes a Leaking Shower Head
Leaks at the Connection
A connection leak shows at the threads between the head and the shower arm while water is running. Three causes explain nearly all of them: a joint that worked itself loose, a gasket crushed flat by overtightening, or a blocked debris screen forcing water back out of the joint.
Leaks from the Spray Face
Hard water leaves mineral deposits in the nozzles. Once the holes partially block, pressure pushes water out at odd angles or past the seams of the housing. A scattered spray pattern usually shows up before the dribbling does.
On a multi-function head, scale in the mode selector can let water escape from a setting you did not choose. If water comes from a pressed seam in the body rather than a hole, that head is not repairable.
Dripping After the Water Is Off
Dripping when off almost always points away from the head and toward the valve inside the wall. A worn cartridge no longer seals against its seat, so pressurized water sneaks past and trickles out even when nobody is using the shower.
Residual drainage is different. After shutdown, gravity empties the arm and head, which is a handful of drops that stop within about 30 to 60 seconds. Anything still dripping five minutes later is a real leak.
Small drips add up. EPA WaterSense reports that household leaks waste close to a trillion gallons nationwide each year, which is why it runs an annual Fix a Leak Week campaign every March.
How to Replace a Shower Valve Cartridge
If the drip continues with the handle off, the cartridge is next.
Shut off the supply, pry off the handle cap, back out the handle screw, and pull the handle. Remove the escutcheon plate and release the retaining clip or bonnet nut.
Before you pull anything, mark the cartridge orientation with a marker. Seat the new one the same way, reassemble, and test.
Cartridges are brand and model specific. They do not cross between manufacturers, and often not between series from the same manufacturer, so identify the valve before ordering.
| Brand | How to recognize it | Where to find the model | Puller tool likely? |
|---|---|---|---|
| Moen | Round escutcheon, lever handle with a small hex set screw underneath | Stamped on the brass valve body or the cartridge stem | Often, on stuck 1225 and 1222 cartridges |
| Delta | Bonnet nut under the handle, ball or MultiChoice universal body | Cast into the valve body behind the escutcheon | Rarely |
| Kohler | Squared trim, Rite-Temp valves with a plastic cap | Printed on the cartridge cap or valve body | Sometimes |
| Pfister | Compact plastic cartridge, usually with a metal clip | On the cartridge body itself | Rarely |
| American Standard | Ceramic disc cartridge retained by a bonnet nut | On the trim box or valve body | Occasionally |
Several of these brands run lifetime parts programs for the original homeowner, so check the current warranty terms with the manufacturer before you pay for a cartridge.
The mistake that generates the most callbacks on our own service board: the cartridge goes back in rotated 180 degrees, so hot and cold swap. If the handle now runs backward, pull it and flip it. And if a correct, correctly-oriented cartridge still drips, the valve body is likely scored, which is plumber territory.
Repair or Replace the Shower Head?
| Situation | Repair | Replace |
|---|---|---|
| Gasket flattened, everything else solid | Yes, a few dollars in parts | No |
| Nozzles scaled but housing intact | Yes, vinegar soak | No |
| Leak returns after a new seal | No | Yes |
| Water escaping from a crimped seam | No | Yes |
| Green corrosion or cracks at the fitting | No | Yes |
| Head roughly 10 years old or older | Marginal | Usually worth it |
New heads sold in the United States are held to a maximum of 2.5 gallons per minute. That number comes from the 1992 federal energy law, and the Department of Energy confirmed the 2.5 gpm standard again in April 2025 when it repealed the separate regulatory definition of "showerhead." The flow cap itself did not change.
If you are replacing anyway, a WaterSense labeled model is the easy upgrade. DOE's Building America guidance on showerheads notes that showering is roughly 17 percent of indoor residential water use, and labeled heads cut that by about 20 percent.
Planning a bigger refresh at the same time? Our faucet installation and repair team handles fixture swaps alongside shower work.
When to Call a Plumber
Stop and call someone when:
- Water appears at the wall, ceiling, or floor, not just the fixture
- The head will not detach, or will not reattach cleanly
- The shower arm spins freely inside the wall, a sign the drop-ear elbow has come loose
- The drip survives both a new seal and a new cartridge
- You cannot find a working shutoff for the bathroom
A leak behind the wall causes far more damage than the fixture ever will, and it hides until drywall stains. That is what our leak repair crews spend most of their bathroom calls chasing.
Aumenta Plumbing is a licensed New Jersey plumbing contractor serving Union, Morris, and Somerset county towns including Westfield and Mountainside. Valve body replacement is usually an afternoon job for a licensed tech.
Need it handled today? Get a free estimate and we will diagnose the leak before anything gets opened up.
FAQ
Why does my shower drip when turned off?
Drops in the first 30 to 60 seconds are residual water draining out of the arm and head, which is normal. A continuous drip lasting minutes or hours means the valve cartridge is no longer sealing. Replacing the cartridge is the standard fix.
Can I fix a leaking shower head myself?
Usually yes. Cleaning the head, swapping the gasket, and retaping the threads need one wrench and no plumbing experience. Cartridge replacement is a step harder because you have to shut off the main and identify the exact part, but it is still a common DIY job.
How much does it cost to fix a leaking shower head?
A gasket or O-ring is a few dollars. A brand-specific valve cartridge typically runs roughly $15 to $60, and a decent replacement head starts around $25. A professional service call costs more than the parts, so it is worth trying the gasket first.
Do I need plumbers tape on a shower head?
Yes on the shower arm threads, and only there. Two to three clockwise wraps is enough. Never put tape on top of the rubber gasket inside the connection nut, because that seal works by compression and tape prevents it from seating.
How much water does a leaking shower head waste?
More than the drip suggests. EPA WaterSense has estimated that a showerhead leaking at 10 drips per minute wastes over 500 gallons a year, and household leaks overall account for close to a trillion gallons nationwide annually.
Why is my brand new shower head leaking?
Three usual suspects: the factory gasket got pinched or left out during install, the threads were overtightened and the plastic nut cracked, or the head was cranked down onto tape-choked threads. Take it off, inspect the gasket, retape cleanly, and hand tighten plus a quarter turn.
Is a dripping shower head a plumbing emergency?
Almost never. It wastes water and should be fixed soon, but it is not urgent. Treat it as an emergency if water appears at the wall, if a ceiling below the bathroom stains, or if you have no working shutoff to stop the flow.
Why is my shower head still dripping after I replaced the cartridge?
Three realistic causes. The cartridge may be the wrong model for your valve, it may be installed rotated out of position, or the valve body and seats are scored so no cartridge can seal against them. That last case needs a licensed plumber.
Written by the Aumenta Plumbing service team, licensed plumbing contractors working in northern and central New Jersey. Questions about a leak in your own bathroom? Contact us or browse our full range of plumbing services.